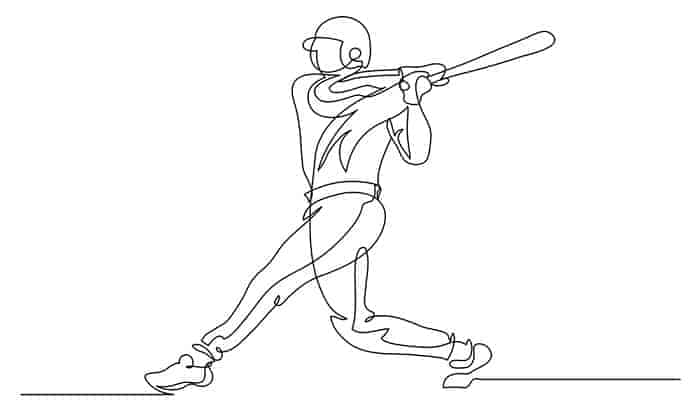
If you want to learn how to draw a baseball player, you are in the right place. In this article, we will show you a simple way to illustrate a player hitting the ball—as in the stadium or on TV.
In short, you will need to carry out four steps:
- Draw the head, face, and neck
- Draw the upper body and the bat
- Draw the lower body
- Draw the baseball
For details on mastering drawings of baseball players, continue reading!
Contents
What You Will Need to Have
Before you delve into any drawing, prepare the following materials:
- Paper (With or without grids)
- Sketching Pencil
- Eraser
You should also find a roomy and preferably quiet place to work. Once you have everything ready, proceed to the next section.
How to Draw a Baseball Player Step by Step
Step 1: Draw the Head, Face, Neck
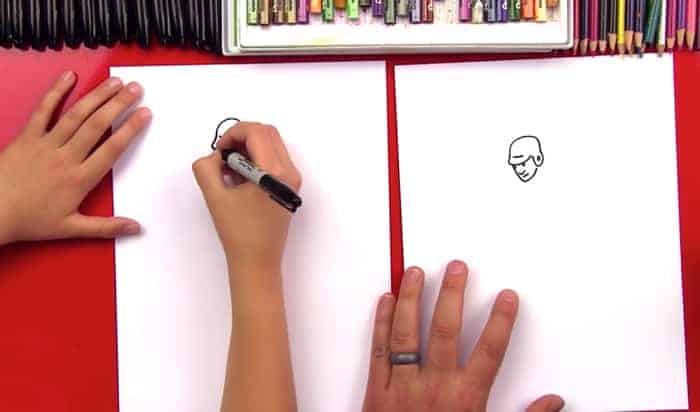
1. On a flat surface, like a table, lay out your sheet of paper. Orientate it vertically to begin.
2. First, draw the top of the player’s head with a sharp stroke. It should look like an upside-down U or C. This will be the helmet of the baseball player.
3. Then, continue with the visor on the left and the earpiece on the right. Add a short straight line as detail for the visor and a circle for the earpiece. The headgear should now mirror those in real life.
4. Now, draw the face. Do this in two steps. A downward stroke should come from the visor—next, an upward stroke from the endpoint of the previously-made downward stroke for the jawline. The second stroke should finish by touching the bottom of the earpiece drawn in step 3.
5. Moving onto the details of the face, draw the nose with a V-like stroke. This should be at about half of the player’s face and a bit to the left. Continue with a short, slightly curved line for the mouth. Here, we are drawing a serious expression. But, you can opt for a smile if you want.
6. Put in the eyes with a light dot right beneath the helmet. At this point, you have the head of the player, tilting down.
7. Draw the neck with two short parallel lines stemming from the head. Make sure your strokes are short. Otherwise, it will look disproportionate. This is a bit difficult to nail on the first try. So, do not be discouraged if you have to erase and redraw a few times. To complete the neck, connect the two ends of the lines.
Step 2: Draw the Upper Body and Bat
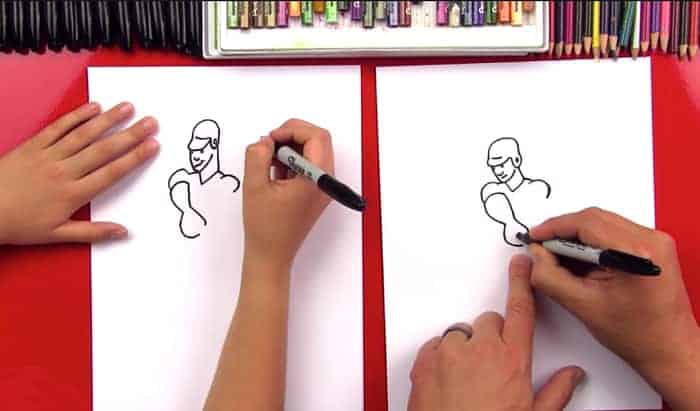
1. Add the shoulders on either side of the neck. Do a thin and short line first. This will be the joint muscle. From here, draw the bulge shoulder pad with a round stroke. Imagine you are drawing a semicircle, like a rainbow.
2. Draw another downward curve stroke about half a centimeter below the left shoulder bulge. This is the first portion of the biceps leading to the arm of the player. At this step, envision a hand that is going out towards you. On the left end of the curve, draw a stubby C, and on the right end, draw a straight line. Both strokes should end at the same length, slightly going towards each other. This forms the upper side of the arm.
3. From there, draw two more Cs facing each other for the knuckles. At the bottom, to the left, draw another tiny downward-facing C. This is the part where the bat starts.
4. Continuing the tiny downward C, draw a straight but long line out towards the left. Finish one side before going to the other side. Remember, because the bat is going towards you, the second line goes together with the first will look like an opening V (Art students, this is where perspective comes in).
5. Connect the two lines with a backward C. Then, draw another small C to form the round end of the bat.
6. Finish up the other arm by linking it to the bat. Your stroke should come up from bat, round, then back in. It will look like his knuckles are concealed. But, for details, draw a small curve beneath the other hand to represent part of his knuckles holding the bat.
Step 3: Draw the Lower Body
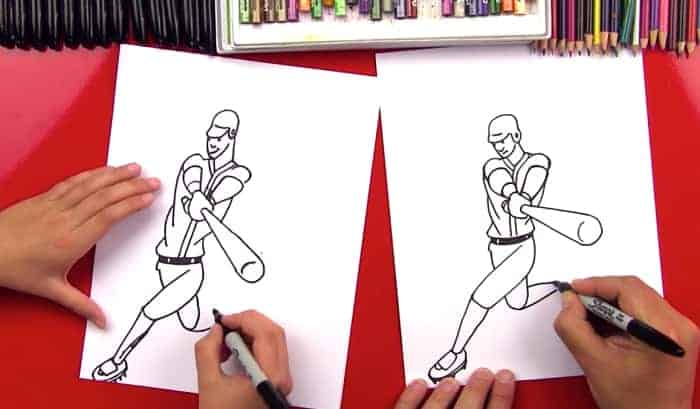
1. Pick a stroke up from the top of the shoulders. Going down and slightly inwards, this will be the torso and hips. Do the same for the other side.
2. Then, draw another line that comes out of the previous ones to show the player’s twisting posture. Add in the hem of the shirt with two short lines point outwards. Connect them to finish.
3. For a realistic portrayal, draw in details for the jersey. You have got the body!
4. Leading up to the legs, draw the belt. Here, you have the option to shade it. Then, onto the legs, draw a diagonal line, going from the left end of the belt for the right leg. Stop at the knee, then move the stroke downwards to mimic the bent legs. Draw the back of the legs and cut a line through at the knee to signal the end of the pants.
5. From below the pants, finish the calves and long socks.
6. For the ankle and shoe, draw a curve upward-facing stroke. Use an oval for the shoe and add a thinner layer underneath for the sole.
7. Now, go back to the left leg. Do the same diagonal line but this time from the right over. Make sure that the knee is at the same height as the right knee, at the point that cuts off to signal the hem of the pants, round it.
8. Draw the lower portion of the legs but towards the right side, like a sideway V. Again, round up the ends for the ankles and finish with the shoe. You can consider adding in small details like the spikes on the soles and the laces on the face of the shoe.
Step 4: Draw the Baseball
1. Finally, draw the baseball. It should be big to align with the perspective that we are going for (Reminder: the ball is coming towards our face so it is big).
2. Here, you can pull up a picture of a baseball for reference. Fill in the iconic stitches on the baseball.
3. Voila! You have got yourself a complete drawing of a baseball player in action.
With that, you have reached the end of this tutorial.
If you want to draw a baseball player in other positions, take a look at this site with more printables, drawing tutorials, and free lessons.
Conclusion
That concludes our article on how to draw a baseball player. Hopefully, you found it easy to follow. If you have any follow-up questions or thoughts on this topic of baseball player drawings, feel free to leave a comment. We are always delighted to hear from our readers. Also, share your baseball player sketch with us!
Read more: Steps to draw a baseball field.

Five years as a baseball player, my training approaches with this game give me the motivation to inspire and support young players more. Like all sports, we should start with the desire to have fun and maintain our resilience to strive better at any competition. But, of course, some of us want to have some fun and train for better health. It does not matter what your initial purpose is; I believe that most people ever holding on to the baseball bat will fall in love with the games as I do.